
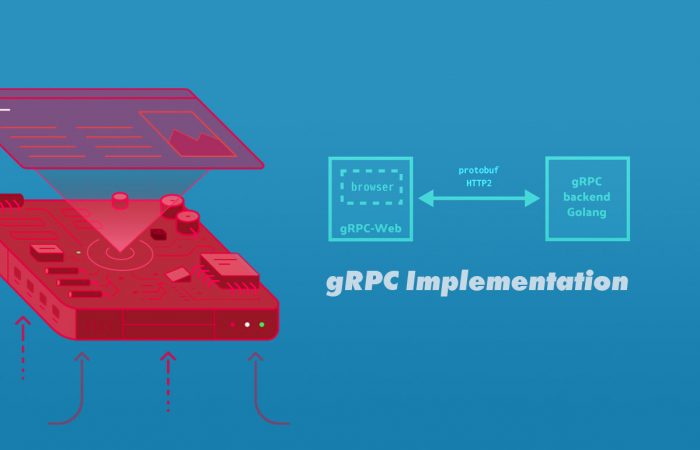
I participated in the design of a software architecture recently. Encountered many difficulties during the period, but they can be solved as long as I work hard. The microservices of the front-end and isolation layer (including UI, file management system, plug-in system, data processing, etc.) are based on React + Nextjs + Nodejs + Lerna + gRPC. Not only that the back-end protocol follows the HTTP/2 long connection and its two-way communication.
Then here, I would to talk about gRPC. Perhaps many small and medium-sized projects have not adopted it, and it has some complexities compared to REST. But in view of the data interaction, such as request and response, it will be a very nice choice. About gRPC, please search for relevant information by yourself. This article is mainly to fully implement a demonstration from 0 to 1.
During, compiling proto files will use grpc, grpc-web and some related plug-ins, and service testing will use envoy proxy + webpack. Well, without further ado, let’s get started:
 File Structures
grpc-getting-started/
├── README.md
├── LICENSE
├── package.json
├── package-lock.json
├── envoy.yaml
├── server.js
├── build/
├── scripts/
├── dist/
│   ├── client-main.js
│   └── index.html
├── proto/
│   ├── example.proto
│   └── other.proto
├── src/
│   ├── proto/
│   ├── client/
│   └── server/
└──
(1) Defining the Service
We start by defining a service, specifying methods that can be called remotely along with their parameters and return types.
This is done in the .proto file using the protocol buffers. They are also used for describing the structure of the payload messages.
Create a proto file proto/example.proto:
// Step 1. Basic Configurations
// ====================================================
// The first line tells the compiler what syntax is used in this file.

// The second line belongs to the namespace, which is used to prevent naming conflicts between different message types

syntax = "proto3";
package hello;


// Step 2. Defining the Message Structure
// ====================================================
// This defines the request payload. Here each attribute that goes into the message is defined along with its type.

// A unique number needs to be assigned to each attribute, called as the tag. This tag is used by the protocol buffer to represent the attribute instead of using the attribute name.

// So, unlike JSON where we would pass attribute name firstName every single time, protocol buffer would use the number 1 to represent firstName. Response payload definition is similar to the request.


message HelloRequest {
    string firstName = 1;
    string lastName = 2;
}

message HelloResponse {
    string greeting = 1;
}


// Step 3. Defining the Service Contract
// ====================================================
// Finally, let's define the service contract. For our HelloService we define a GetHelloReq() operation:

service HelloService {
    rpc GetHelloReq(HelloRequest) returns (HelloResponse);
}
(2) Generating the Code —— Compile the .proto file to .js
Step 2.1. Install the grpc-web runtime library
$ cd /{your_directory}/grpc-getting-started
$ npm i --save-dev grpc-web
Step 2.2. Install a protoc plugin ts-protoc-gen that generates TypeScript
$ npm i --save-dev ts-protoc-gen @improbable-eng/grpc-web
Step 2.3. Install the code generator plugin protoc
$ PROTOC_ZIP=protoc-22.2-osx-x86_64.zip
$ curl -OL https://github.com/protocolbuffers/protobuf/releases/download/v22.2/$PROTOC_ZIP
$ sudo unzip -o $PROTOC_ZIP -d /usr/local bin/protoc
$ sudo unzip -o $PROTOC_ZIP -d /usr/local 'include/*'
$ rm -f $PROTOC_ZIP
You can also use the following command to install (macOS):
$ brew install protobuf
Check the version after the installation is complete
$ protoc --version
Step 2.4. Proceed to install plugins protoc-gen-js and protoc-gen-grpc-web
$ sudo npm i -g protoc-gen-js protoc-gen-grpc-web
Step 2.5. Compile and execute
Run the following command to compile the .proto file and generate a .js file we can recognize.
$ npm run build:protos
It will generate four files:
src/proto/example_pb.jssrc/proto/example_pb.d.tssrc/proto/example_pb_service.jssrc/proto/example_pb_service.d.ts
You can download protobuf-javascript to test. The tutorial please visit here.
sh

$ mkdir src/proto
To generate the protobuf message classes, run the following command:
sh

$ protoc  --proto_path=./proto --plugin=protoc-gen-ts=./node_modules/.bin/protoc-gen-ts --js_out=import_style=commonjs,binary:src/proto --ts_out="src/proto" proto/example.proto
To generate the client stub, run the following command:
sh

$ protoc  --proto_path=./proto --plugin=protoc-gen-ts=./node_modules/.bin/protoc-gen-ts --ts_out="service=grpc-web:src/proto"  proto/example.proto
(3) Server Entry
Next, we implement our HelloService interface using Node in the backend gRPC. This will handle requests from clients. The tutorial please visit here.
Step 3.1. Install plugin grpc-node
$ npm i --save-dev @grpc/grpc-js @grpc/proto-loader
Step 3.2. Create a file src/server/index.js:
const path = require('path');
const grpc = require("@grpc/grpc-js");
const protoLoader = require("@grpc/proto-loader");
const PROTO_PATH = path.resolve(__dirname, '../../proto/example.proto');


const packageDefinition = protoLoader.loadSync(PROTO_PATH, {
    keepCase: true,
    longs: String,
    enums: String,
    defaults: true,
    oneofs: true,
});
const newsProto = grpc.loadPackageDefinition(packageDefinition);
/*
{
    hello: {
        HelloRequest: {
            format: 'Protocol Buffer 3 DescriptorProto',
            type: [Object],
            fileDescriptorProtos: [Array]
        },
        HelloResponse: {
            format: 'Protocol Buffer 3 DescriptorProto',
            type: [Object],
            fileDescriptorProtos: [Array]
        },
        HelloService: [class ServiceClientImpl extends Client] {
            service: [Object],
            serviceName: 'HelloService'
        }
    }
}
*/


class gRPC extends grpc.Server {
    constructor() {
        super();
        this.addService(newsProto.hello.HelloService.service, {
            getHelloReq: this.getHelloReq
        });
    }

    /**
     * request handler.
     */
    getHelloReq(call, callback) {
        const { firstName, lastName } = call.request;

        if( firstName !== '' ) {
            callback(null, {
                greeting: `Hello: ${firstName} ${lastName}`
            });
        } else {
            callback({
                message: 'Name not found',
                code: grpc.status.INVALID_ARGUMENT
            });
        }
    }
}


function main() {
    const server = new gRPC();
    server.bindAsync(
        '127.0.0.1:9090', grpc.ServerCredentials.createInsecure(), (err, port) => {
            if (err) throw err;

            console.log(`Server running at http://127.0.0.1:${port}`);
            server.start();
        }
    );
}

main();


/*

function copyMetadata(call) {
    const metadata = call.metadata.getMap();
    const responseMetadata = new grpc.Metadata();
    for (let key in metadata) {
        responseMetadata.set(key, metadata[key]);
    }
    return responseMetadata;
}
function getHelloReq(call, callback) {
    const { firstName, lastName } = call.request;

    if( firstName !== '' ) {
        callback(null, {
            greeting: `Hello: ${firstName} ${lastName}`
        }, copyMetadata(call));
    } else {
        callback({
            message: 'Name not found',
            code: grpc.status.INVALID_ARGUMENT
        });
    }
}
function main() {
    const server = new grpc.Server();
    server.addService(newsProto.hello.HelloService.service, {
        getHelloReq: getHelloReq
    });
    ...
}

*/
(4) Client Entry
Create a file src/client/index.js:
const { HelloRequest } = require('../proto/example_pb.js');
const { HelloServiceClient } = require('../proto/example_pb_service.js');


const client = new HelloServiceClient('http://' + window.location.hostname + ':12345', null, null);


function todo(str1, str2) {

    return new Promise((resolve, reject) => {
        const req = new HelloRequest();
        req.setFirstname(str1);
        req.setLastname(str2);

        client.getHelloReq(req, {}, function (err, response) {
            if (err) {
                resolve(err);
                //reject(err);
            } else {
                resolve(response.getGreeting());
            }
        });

    })
}

// create form
//===================
const container = document.createElement("div");

const input1 = document.createElement("input");
input1.type = "text";
input1.id = "input1";
input1.placeholder = 'FirstName'
container.appendChild(input1);

const input2 = document.createElement("input");
input2.type = "text";
input2.id = "input2";
input2.placeholder = 'LastName'
container.appendChild(input2);

const hr = document.createElement("hr");
container.appendChild(hr);

const btn = document.createElement("button");
btn.innerHTML = "Submit";
btn.id = "btn";
container.appendChild(btn);

document.body.appendChild(container);

const $btn = document.getElementById('btn');
$btn.addEventListener('click', (e) => {
    e.preventDefault();
    main(document.getElementById('input1').value, document.getElementById('input2').value);
});


// display response
//===================
async function main(str1, str2) {
    const data = await todo(str1, str2);
    console.log(data);

    const div = document.createElement("h3");
    div.innerHTML = data;
    document.body.appendChild(div);
}
(5) Generate the client file
Finally, putting all these together, we can compile all the relevant JS files into one single JS library that can be used in the browser.
Step 5.1. Install dependencies
$ npm i --save-dev webpack webpack-cli webpack-dev-server html-webpack-plugin browserify google-protobuf
Step 5.2. Create one file for custom webpack configurations
build/client.config.js:
const path = require('path');
const HtmlWebpackPlugin = require("html-webpack-plugin");

const clientPort = process.env.PORT || 10005;
const clientHost = process.env.HOST || 'localhost';
const devMode = process.env.NODE_ENV !== 'production';

module.exports = {
    mode: 'production',
    performance: {
        hints: !devMode ? "warning" : false
    },
    resolve: {
        fallback: {
            "fs": false
          },
        extensions: ['.js']
    },
    entry: {
        'client-main': './src/client/index.js'
    },
    output: {
        filename: '[name].js',
        path: path.resolve(__dirname, '../dist')
    },
    plugins: [
        new HtmlWebpackPlugin({
            title: "Webpack Output",
        }),
    ],
    devServer: {

        // Enable compression
        compress: false,

        //
        host: clientHost,
        port: clientPort

    }
};
Step 5.3. Compile the JS Library
$ npm run build:client
or
$ npx webpack --progress --mode production --config ./build/client.config.js
It will generate a js file dist/client-main.js and a html file dist/index.html
Step 5.4. Webpack server configuration
Create a new server file server.js
const Webpack = require('webpack');
const WebpackDevServer = require('webpack-dev-server');
const webpackConfig = require('./client.config.js');

const compiler = Webpack(webpackConfig);
const devServerOptions = { ...webpackConfig.devServer, open: true };
const server = new WebpackDevServer(devServerOptions, compiler);

const runServer = async () => {
  console.log('Starting server...');
  await server.start();
};

runServer();
(6) Deploy the backend service and test
Step 6.1. Install envoy
A full installation of Xcode.app is required to compile envoy. Installing just the Command Line Tools is not sufficient.
such as macOS 12.6.3, you need to download:
Xcode_14.2
$ brew update
$ brew install envoy
$ envoy --version
$ go version
⚠️ a) If run
brew updateorbrew install envoyERROR, Enter following command to fix it:macOS or Linux
Open your terminal and execute
$ xcode-select --install
$ cd /usr/local/Homebrew/Library/Taps/homebrew/homebrew-core/
$ git pull
$ brew update-reset
$ brew install envoy
⚠️ b) When using go to start the service, an error is reported dial tcp xx.xx.xx.xx:443: i/o timeout
Manually configure sources
$ export GO111MODULE=on
$ export GOPROXY=https://goproxy.cn
The above configuration steps will only take effect in the current terminal, how to take effect for a long time, so that there is no need to configure environment variables every time.
$ echo "export GO111MODULE=on" >> ~/.profile
$ echo "export GOPROXY=https://goproxy.cn" >> ~/.profile
$ source ~/.profile
⚠️ c)
bazeliskdo not provide support for this old version.Upgrade your operating system.
Step 6.2. Configure the Envoy Proxy
Create a new file envoy.yaml:
static_resources:
  listeners:
    - name: listener_0
      address:
        socket_address: { address: 127.0.0.1, port_value: 12345 }
      filter_chains:
        - filters:
          - name: envoy.filters.network.http_connection_manager
            typed_config:
              "@type": type.googleapis.com/envoy.extensions.filters.network.http_connection_manager.v3.HttpConnectionManager
              codec_type: auto
              stat_prefix: ingress_http
              route_config:
                name: local_route
                virtual_hosts:
                  - name: local_service
                    domains: ["*"]
                    routes:
                      - match: { prefix: "/" }
                        route:
                          cluster: hello_service
                          timeout: 0s
                          max_stream_duration:
                            grpc_timeout_header_max: 0s
                    cors:
                      allow_origin_string_match:
                        - prefix: "*"
                      allow_methods: GET, PUT, DELETE, POST, OPTIONS
                      allow_headers: keep-alive,user-agent,cache-control,content-type,content-transfer-encoding,custom-header-1,x-accept-content-transfer-encoding,x-accept-response-streaming,x-user-agent,x-grpc-web,grpc-timeout
                      max_age: "1728000"
                      expose_headers: custom-header-1,grpc-status,grpc-message
              http_filters:
                - name: envoy.filters.http.grpc_web
                  typed_config:
                    "@type": type.googleapis.com/envoy.extensions.filters.http.grpc_web.v3.GrpcWeb
                - name: envoy.filters.http.cors
                  typed_config:
                    "@type": type.googleapis.com/envoy.extensions.filters.http.cors.v3.Cors
                - name: envoy.filters.http.router
                  typed_config:
                    "@type": type.googleapis.com/envoy.extensions.filters.http.router.v3.Router
  clusters:
    - name: hello_service
      connect_timeout: 0.25s
      type: logical_dns
      http2_protocol_options: {}
      lb_policy: round_robin
      # win/mac hosts: Use address: host.docker.internal instead of address: localhost in the line below
      load_assignment:
        cluster_name: cluster_0
        endpoints:
          - lb_endpoints:
            - endpoint:
                address:
                  socket_address:
                    address: 127.0.0.1
                    port_value: 9090
⚠️ If you are running Docker on Mac/Windows, change the last address:
localhostto... socket_address: address: host.docker.internalor if your version of Docker on Mac older then v18.03.0, change it to:
    ...
    socket_address:
        address: docker.for.mac.localhost
Step 6.3. Run the Envoy proxy.
The envoy.yaml file configures Envoy to listen to browser requests at port 12345, and forward them to port 9090.
$ npm run proxy
or
$ envoy -c ./envoy.yaml
Step 6.4. When these are all ready, you can open a browser tab and navigate to http://localhost:10005
- the NodeJS gRPC Service (port
9090) - the webpack server (port
10005)
run following command to test:
$ npm run start
or
$ node ./server.js & node ./src/server/index.js
Step 6.5. Test connection
Use the command to detect:
$ curl -I http://localhost:12345/hello.HelloService/GetHelloReq?firstName=Amy&lastName=Grant